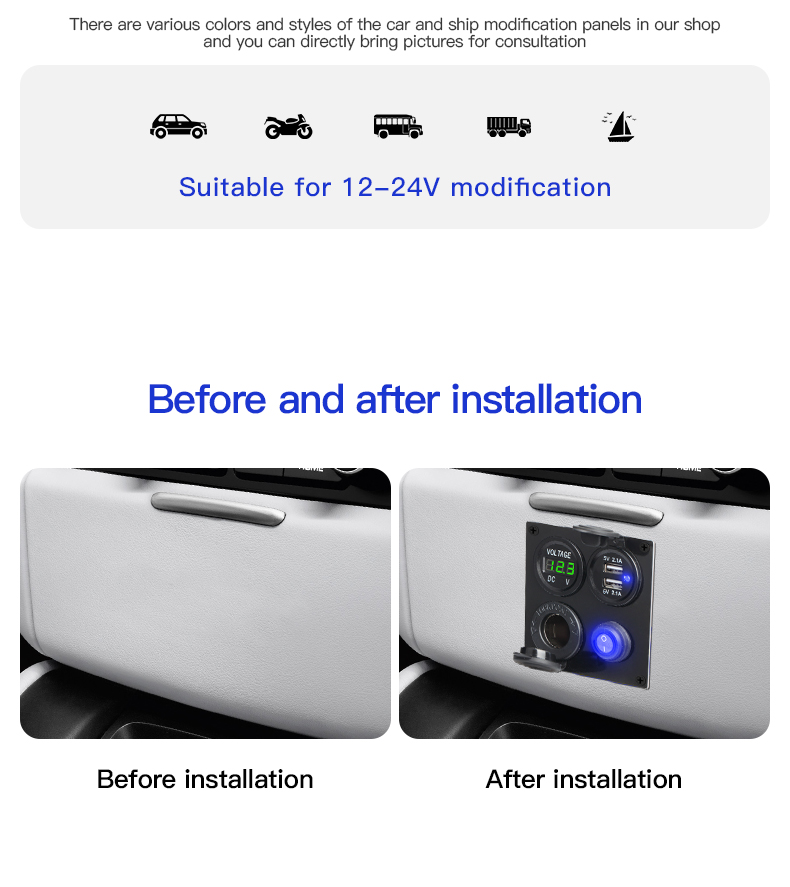
Where to install auto switch panel?
An auto switch panel is a device that automatically switches between different power sources, such as generators and shore power. It provides a convenient and safe way to ensure that your electrical systems have a constant and reliable source of power. In this article, we will guide you through the process of installing an automotive switch panel in your boat or RV.
Step 1: Plan the Installation for automotive switch panel
Before you start the installation process, it is important to plan ahead. This involves choosing the right location for the panel, determining the power requirements, and selecting the appropriate components.
Location: The automotive switch panel should be mounted in a location that is easily accessible and protected from the elements. A dry and well-ventilated area is ideal, such as in the galley or in the electrical panel area.
Below is the suggest location for electrical switch panel:
- In the main control panel: Many RVs have a main control panel that houses all of the switches and controls for the various systems and functions within the RV. The automatic switch panel can be installed in this main control panel, along with the other switches and controls.
- In a dedicated control panel: If the auto switch panel has a large number of switches or controls, or if it is designed to control a specific system or function, it may be installed in a dedicated control panel. This could be a separate panel located in the same area as the main control panel, or it could be a panel located in a different part of the RV.
- In a cabinet or closet: If there is limited space in the main control panel or if the electrical switch panel is not used frequently, it may be installed in a cabinet or closet within the RV. This can help to keep the panel out of the way and prevent it from taking up valuable space in the main living areas of the RV.
- Under the dashboard: In some cases, the auto switch panel may be installed under the dashboard of the RV, near the driver’s seat. This can be a convenient location for accessing the panel while driving, and it can also help to keep the panel out of sight when not in use.
- In the cargo area: If the auto switch panel is being used to control systems or functions related to the cargo area of the RV, such as the generator or external lighting, it may be installed in the cargo area. This can be a convenient location for accessing the panel while loading or unloading the RV.
Power Requirements: The automotive switch panel should be capable of handling the total electrical load of your boat or RV. To determine the power requirements, you should add up the current draw of all the electrical devices on your boat or RV and select an auto switch panel that is capable of handling that load.
Components: There are several components that are necessary for a successful installation. These include the auto switch panel, a circuit breaker, a transfer switch, and wiring. The type of components required will depend on the type of auto switch panel you choose.
Step 2: Prepare the Electrical System for electrical switch panel
Before you can install the electrical switch panel, you need to prepare the electrical system. This involves turning off the power to your boat or RV and verifying that the battery is disconnected.
Step 3: Mount the automotive switch panel
The next step is to mount the automotive switch panel. This involves drilling holes in the appropriate location and securing the panel with screws or brackets. The panel should be mounted level and secure.
Step 4: Connect the Circuit Breaker
The circuit breaker is an important component that provides protection to the electrical system. It should be connected to the auto switch panel and wired to the battery or shore power.
Step 5: Install the Transfer Switch
The transfer switch is responsible for automatically switching between different power sources. It should be installed in a location that is close to the auto switch panel and connected to both the generator and shore power.
Step 6: Wiring for the electrical switch panel
The final step is to wire the electrical switch panel, circuit breaker, and transfer switch. This involves connecting the appropriate wires to the correct terminals and making sure that all connections are secure. The wiring should be done in accordance with the manufacturer’s instructions and relevant electrical codes.
Step 7: Test the System
Once the installation is complete, it is important to test the system to make sure that it is working correctly. This involves turning on the power and verifying that the transfer switch is switching between the different power sources as expected.
Installing an electrical switch panel is a relatively straightforward process that can provide many benefits. It ensures that your electrical systems have a constant and reliable source of power, which can improve the performance of your boat or RV and reduce the risk of damage to your electrical systems. By following the steps outlined in this article, you can successfully install an auto switch panel and enjoy peace of mind while on the water or on the road.

Will it do harm to the battery when install a automotive switch panel?
Installing a switch panel in a vehicle can be a great way to add new features and capabilities to your vehicle, but if it’s not done correctly, it could potentially harm your battery. In this article, we’ll discuss some of the ways in which installing a switch panel could harm your battery, as well as some steps you can take to avoid this.
Incorrect way of electrical switch panel installtion
First of all, it’s important to understand how your vehicle’s battery works. Your vehicle’s battery is responsible for providing power to the electrical system when the engine is off, as well as providing a burst of power when you turn the key to start the engine. The battery is also responsible for providing power to other electrical components, such as lights and accessories, when the engine is running.
When you install a auto switch panel in your vehicle, you’re adding new electrical components that will draw power from the battery. If the switch panel is installed incorrectly or if the wiring is done improperly, it could cause the battery to be drained too quickly. This could lead to a dead battery, which could cause you to be stranded on the side of the road.
Another way in which installing a switch panel could harm your battery is if the switch panel draws too much power. If the switch panel is wired directly to the battery, it could draw too much power and cause the battery to become damaged. This could lead to a reduced battery life, or even a dead battery.
Install the automotive switch panel in correct way
To avoid these problems, it’s important to take some precautions when installing a auto switch panel in your vehicle. First, you should make sure that the switch panel is installed by a professional or by someone who is experienced with automotive electrical systems. This will help to ensure that the switch panel is installed correctly and that the wiring is done correctly.
Additionally, you should make sure that the auto switch panel is wired correctly. This means using appropriate fuses and switches to prevent the switch panel from drawing too much power. It’s also important to ensure that the wiring is done correctly, with the appropriate wire gauges and connections.
If you’re not confident in your ability to install the automotive switch panel correctly, it’s best to have a professional handle the installation for you. This will help to ensure that the switch panel is installed correctly and that the battery is not damaged during the process.
It’s also important to regularly maintain your vehicle’s battery to ensure that it stays in good condition. This means checking the battery’s voltage regularly, keeping the battery terminals clean, and making sure that the battery is securely mounted. If you notice that your battery is not holding a charge, it’s important to have it tested to determine the cause of the problem.

In conclusion, installing a automotive switch panel in your vehicle can be a great way to add new features and capabilities, but it’s important to do it correctly to avoid potentially damaging your battery. By following the steps outlined in this article, you can help to ensure that your switch panel is installed correctly and that your battery remains in good condition.
