
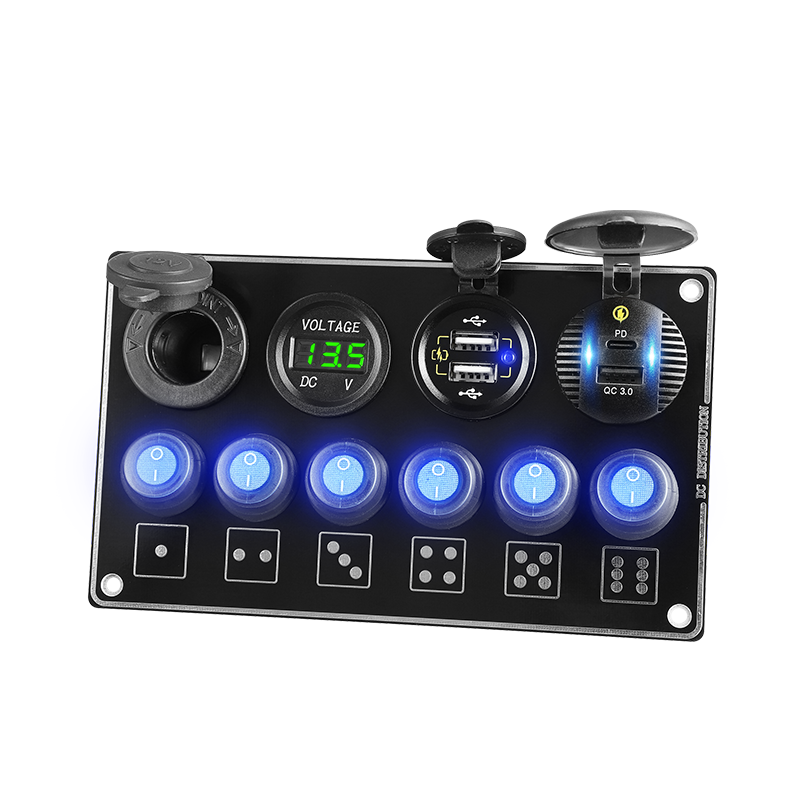
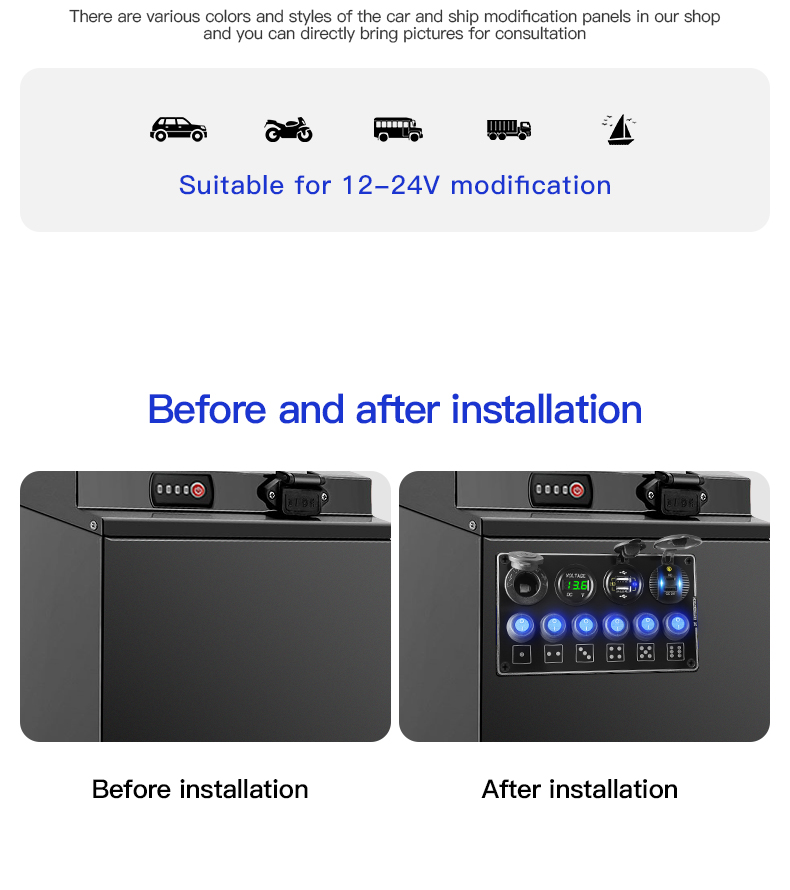
How to wire a 6 pins rv switch panel?
Wiring a 6-pin RV switch panel can seem like a daunting task, but with the right tools and a bit of knowledge, it’s a task that can be easily accomplished by even the most novice of DIYers. In this article, we will walk through the process of wiring a 6-pin RV switch panel, including the materials you will need, and the steps to take to ensure that your new switch panel is properly installed and functioning correctly.
7 steps to install a rv rocker switch
Materials needed:
6-pin RV switch panel
Electrical wiring (14-gauge stranded wire is recommended)
Wire connectors (such as butt connectors or wire nuts)
Electrical tape or heat-shrink tubing
Screwdriver
Voltage tester
Turn off power to the RV
Before beginning any electrical work, it is important to make sure that the power to the RV is turned off to prevent the risk of electrocution. You can do this by either unplugging the RV from its power source or by turning off the main circuit breaker.
Identify the wires that will be connected to the rv switch panel.
The specific wires you will be connecting will depend on the type of switch panel you have and the type of appliances or lights you will be controlling. Typically, these will include power wires for the lights or appliances, as well as ground wires.
Prepare the wires for connection with rv light switch
Strip the ends of the wires to be connected to the rv light switch, making sure to remove any damaged or frayed insulation. Use wire connectors or butt connectors to connect the wires to the switch panel, making sure that the connections are tight and secure.
Insulate the connections for rv switch panel
Use electrical tape or heat-shrink tubing to insulate the connections, ensuring that they will not be exposed to moisture or other elements. This is crucial to protect the electrical connections and prevent the risk of short circuits.
Mount the switch panel rv rocker switch
Once the wiring is complete, you can mount the rv rocker switch panel to the wall of your RV. This will typically involve drilling holes for the mounting screws and securing the panel with the screws provided.
Test the connections for light switch for rv
Test the connections. Before turning the power back on, you will want to test the connections to ensure that they are functioning correctly. This can be done with a voltage tester, which will help you to determine whether the connections are live.
Turn the power back on
Once you have confirmed that the connections are functioning correctly, you can turn the power back on. Test each switch to make sure that it controls the correct lights or appliances.
Finally, it is important to note that wiring a 6-pin RV switch panel is a job that requires a certain level of skill and knowledge. If you are not comfortable working with electrical wiring, it may be best to hire a professional to install your switch panel for you. Remember that safety should always be your top priority, and taking shortcuts can lead to electrical hazards.
In conclusion, wiring a 6-pin RV rocker switch can seem like a daunting task, but with the right tools and a bit of knowledge, it’s a task that can be easily accomplished by even the most novice of DIYers. With careful planning and attention to detail, you can have your new RV switch panel installed and functioning correctly in no time.
How does the electrical system work for the rv rocker switch panel?
The electrical system for an RV switch panel is designed to control and distribute power to various lights and appliances within the recreational vehicle. The switch panel is essentially a central hub that allows the RV owner to easily turn on and off different electrical loads, such as lights, fans, and appliances. Understanding the electrical system for an RV switch panel is important for both DIYers who want to install or maintain their own panel and for anyone who is considering purchasing an RV.
The RV switch panel is typically located near the main electrical service entrance and serves as a distribution point for the 12-volt DC and 120-volt AC power used within the RV. It is connected to the RV’s electrical service, which can be either shore power, a generator, or the RV’s batteries.
12-volt DC power for rv switch panel
The 12-volt DC power is used to power lights, fans, and other low-power loads within the RV. This power is supplied by the RV’s battery or batteries and is controlled by the switch panel’s 12-volt DC circuit breaker. The 12-volt DC circuit breaker is used to protect the RV’s electrical system from overloading and short circuits.
12-volt DC power for RV rocker switch
The 120-volt AC power is used to power appliances, such as the RV’s air conditioning, refrigerator, and microwave. This power is supplied by either shore power or the RV’s generator and is controlled by the switch panel’s 120-volt AC circuit breaker. The 120-volt AC circuit breaker is also used to protect the RV’s electrical system from overloading and short circuits.
The RV switch panel also includes a number of different switches, each of which is used to control a specific load within the RV. These switches are typically labeled with the load they control, such as “lights,” “fan,” or “air conditioner.” When a switch is turned on, it completes the circuit, allowing power to flow to the load it controls.
RV light switch for different indicator
In addition to the rv light switch, the RV switch panel also includes a number of different indicator lights. These lights are used to indicate the status of the RV’s electrical system, such as whether power is being supplied to the RV or whether a circuit breaker has tripped.
One important part of RV’s electrical system is the converter, it changes the power from the shore or generator from 120V AC to 12V DC. This is necessary because most of the RV’s appliances, lights and other equipment runs on 12V DC, which can be supplied by the RV’s batteries. Some of the bigger appliances and air-conditioners need 120V AC and it is supplied via shore or generator power or inverter.
It’s also worth noting that some RVs come equipped with an automatic transfer switch (ATS) which will automatically switch between shore power and generator power as needed.
In addition to the switch panel, the RV’s electrical system also includes a number of other components, such as fuses and circuit breakers. These components are designed to protect the RV’s electrical system from damage by interrupting the flow of electrical current in the event of an overload or short circuit.
The RV switch panel also has a ground terminal, it’s important to have a proper grounding system that ensures a safe and efficient electrical system, it also prevents electrical shocks and reduces the risk of electrical fires.
It’s important to note that the RV switch panel, like all electrical systems, require regular maintenance to ensure they are functioning correctly and safely. This includes checking the connections and wiring, replacing blown fuses and circuit breakers, and monitoring the indicator lights for any issues.
In conclusion, the electrical system for an RV switch panel is a vital component that controls and distributes power to various lights and appliances within the recreational vehicle.